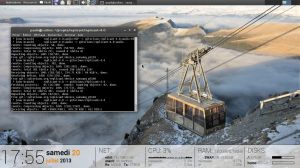
Asus N56VB-S3055H laptop and Debian installation
Written by Paul Kocialkowski 4 commentsAsus N56VB-S3055H
Along with moving on to new studies (I'm done with High School), I got a brand new laptop: an Asus N56VB-S3055H. The hardware specs are really nice, with a quad-core i7-3630QM CPU, 6Gb RAM, 1Tb HDD. I was worried about the integrated nVidia card (GeForce GT 740M) at first, that I suspected to be a cause of problems on GNU/Linux. Thankfully, it does not bother me and the Intel Ivy-bridge card works just fine. I also had the great suprise of finding an ath9k WiFi card shipped with the laptop! You can find a complete hardware review at h-node: Asus N56VB-S3055H
Debian installation
I used to install every new machine with Trisquel GNU/Linux, however I don't really agree with the Linux-libre policy that is about blocking the firmwares load. Moreover, Debian recently made great efforts towards being a fully free distro. So basically, my Debian installation is fully free and the hardware doesn't require loaded non-free firmwares (which means I don't have to use the non-free Debian repo).
Setting up the BIOS
However the BIOS is non-free and it ships with Secure Mode enabled. The BIOS can be accessed by booting with the ESC key pressed and then selecting the option to access Setup. Make sure that you do not let it boot the preinstalled Windows 8 as there is no way to soft turn the computer off if you don't agree to the license terms.
In order to install GNU/Linux, make sure you disable the following options in the BIOS:
- Intel Anti-theft technology
- Fast Boot
- Secure Boot Control
Then enable the following options:
- Launch CCSM (you might want to disable PXE then)
UEFI boot with the Debian installer
With such options in the BIOS, you should be able to boot a GNU/Linux installation disc (and probably an USB install media too). However, be very careful: the BIOS only support UEFI boot from the HDD, so you have to install GRUB with UEFI support. In the debian-installer, I only had to create an UEFI partition (at the begining of the disk) and the installer did the rest. It also set the mountpoint to /boot/uefi. Keeping the Windows UEFI partition (make sure to format it though) would probably work too. As a matter of fact, I failed the installation the first time because I removed the partition (and the Debian installer warned me that it was a bad idea). So things aren't so bad in the end, since there is free software support for UEFI booting.
Setting up the touchpad correctly
The laptop has a synaptics touchpad which didn't work correctly at first: drag'n'drop was not at all possible and both click buttons triggered a left click. After some online research, I found one solution that is to use one-finger click for left click and two-finger click for right click. However, this was far from perfect since this is not the expected behavior and drag'n'drop was still impossible. Here is some documentation about how to set that up though: Left-, Right-, and Middle-click on Clickpad .
The real complete solution was adding some options to the synaptics Xorg input driver so that it handles soft buttons, clickpad and multi-touch.
It consists in creating /usr/share/X11/xorg.conf.d/75-synaptics.conf with the following contents:
Section "InputClass"
        Identifier "Default clickpad buttons"
        MatchDriver "synaptics"
        Option "SoftButtonAreas" "50% 0 82% 0 0 0 0 0"
	Option "ClickPad"         "true"
	Option "EmulateMidButtonTime" "0"
EndSection
Enabling the external subwoofer
Another feature that was missing was the external subwoofer. A couple of steps are required to enable it, described on the ArchWiki page for another Asus laptop: Asus N55SF Audio. However with strictly this, it still didn't work: I had to step up the Bass Speaker volume in alsamixer (make sure to select the Intel HDA card first) and obviously select the newly created 2.1 Output profile on the GNOME sound config app.
Tuning up GNOME
Since the main graphics chip is an Intel one, graphics acceleration worked out of the box on Debian, and I just ignore the nVidia card for now. That means I had the great pleasure of enjoying the use of GNOME-Shell for some time, but quickly went back to the traditional GNOME-Panel, that I find a lot more convenient for developing. Obviously, a lot of tuning up is needed to make the experience perfect.
Backlight, backlight…
I was very surprised with the way GNOME handles both the panel backlight and the keyboard backlight. Basically, these can be dynamically tuned with the media keys (Fn+Something combination keys), which works fine, but none of these changes are kept between sessions and reboots. That means I have to change these after every single login: that is so annying. So my solution was to create an init.d script that stores the backlight values at poweroff and to use a script launched at the GNOME session startup to bring back the previously stored values. It's a shame I have to do this, such basic support should come out of the box with software as popular as GNOME is.
Themes, icons, compositing
Even though it has glitches, I always prefer enabling compositing in metacity so that stuff looks better (transparency, round angles, etc). Since GNOME switched to dconf, here is how I enabled compositing: using dconf-editor: org > gnome > metacity > compositing-manager.
As for the themes I use: Shiki-Colors-Metacity, which is packaged in Debian for window borders, Gnome-brave for icons (packaged as well) and Zukitwo-Sark for GTK+. For the latter, make sure to install its dependencies to avoid unexpected results:
sudo apt-get install gtk2-engines-murrine gtk2-engines-pixbuf
